
Perspex is one of the most popular materials for DIY projects because it is lightweight, strong, and easy to shape compared to glass. However, many beginners struggle when they first try to learn how to cut perspex properly, often ending up with cracked edges, melted lines, or uneven finishes.
However, many beginners struggle when cutting acrylic sheets for the first time. Cracking, chipping, rough edges, and melted plastic are some of the most common problems people face. The good news is that these issues are easy to avoid when you use the correct acrylic cutting tools and proper techniques.
If you are wondering how to cut perspex successfully, this guide covers everything you need to know. You will learn the best cutting methods for different sheet thicknesses, how to choose the right blade, how to avoid cracks, and how to achieve smooth, professional edges at home.
What Is Perspex?
Perspex is a type of acrylic plastic also known as PMMA sheet. Many people also refer to it as plexiglass or acrylic sheet. It is widely used because it is clear, lightweight, weather-resistant, and much stronger than ordinary glass. Unlike glass, Perspex can be cut and shaped using standard DIY workshop tools. This makes it ideal for home projects, protective panels, shelving, display cases, splashbacks, and decorative features.
Although Perspex is durable, it can crack if it is handled incorrectly during cutting. Heat buildup, excessive pressure, and the wrong acrylic saw blade can all damage the material. Understanding the correct cutting method is the first step toward getting clean results.
Essential Safety Tips Before Cutting Perspex
Before starting any acrylic sheet cutting project, safety should always come first. Cutting plastic sheets creates dust, heat, and sharp edges, so proper preparation is important.
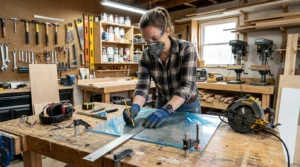
Wear Proper Safety Equipment
Always use:
- Safety goggles
- Gloves
- Dust mask
- Hearing protection when using power tools
Acrylic dust can irritate your eyes and lungs, especially during long cutting sessions.
Keep Your Workspace Stable
Place the acrylic sheet on a flat and secure surface. Movement during cutting increases the risk of cracks and uneven cuts.
Leave the Protective Film On
One of the most common beginner mistakes is removing the protective film too early. Keeping the film attached helps protect the surface from scratches while reducing chipping.
Avoid Excessive Heat
Overheating acrylic is one of the main reasons people struggle when learning how to cut perspex. Heat can melt the edges and create rough finishes. Always cut slowly and allow the blade to do the work naturally.
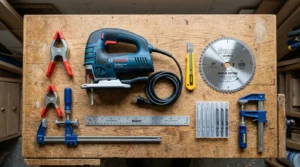
Tools Needed to Cut Perspex Properly
Choosing the right tool depends on the thickness of the acrylic sheet and the type of cut you want to make.
Best Hand Tools for Thin Perspex
Thin acrylic sheets can often be cut using simple hand tools such as:
- Acrylic scoring knife
- Utility knife
- Straight edge ruler
- Clamps
These tools work best for sheets under 3mm thick.
Best Power Tools for Thick Acrylic
For thicker Perspex sheets, power tools deliver cleaner, faster results.
Popular acrylic cutting tools include:
- Jigsaw
- Circular saw
- Table saw
- Router
- Bandsaw
Many of the tools and materials required for this type of project can be found through trusted home improvement suppliers offering quality DIY essentials.
Best Blades for Cutting Acrylic
The best blade for cutting Perspex is usually a fine-tooth blade with carbide-tipped teeth. Fine teeth reduce vibration and help prevent chipping.
Acrylic cutting blades designed specifically for plastic fabrication provide the cleanest finish.
Tools Beginners Should Avoid
Avoid using rough wood cutting blades because they create excessive vibration and increase the risk of cracking.
Cheap blades can also generate heat buildup, which causes melted edges.
Choosing the Right Cutting Method Based on Thickness
Different acrylic thicknesses require different cutting methods.
Under 3mm Acrylic Sheets
Thin sheets are easiest to cut using the score and snap method. This technique works well for straight cuts and does not require expensive tools.
3mm to 6mm Acrylic Sheets
Medium-thickness sheets are best cut with a jigsaw using a fine-tooth acrylic blade.
6mm and Thicker Perspex
Thicker sheets usually require a circular saw or table saw for smooth and accurate cuts.
Using the correct method based on thickness is one of the most important factors in learning how to cut perspex successfully.
How to Cut Thin Perspex Sheets by Scoring and Snapping
The score and snap method is perfect for beginners because it is simple, affordable, and effective.
Step 1: Mark the Cutting Line
Use a marker and ruler to create a straight cutting line.
Step 2: Score the Acrylic Sheet
Place the ruler firmly against the line and use an acrylic scoring knife to cut a deep groove. Repeat several times using steady pressure.
Step 3: Snap the Sheet
Position the scored line along the edge of a table and apply firm pressure downward. The sheet should snap cleanly along the groove.
Common Mistakes to Avoid
- Scoring too lightly
- Applying uneven pressure
- Removing the protective film too early
- Attempting to snap thick acrylic
This method works best for people looking for how to cut acrylic by hand at home.
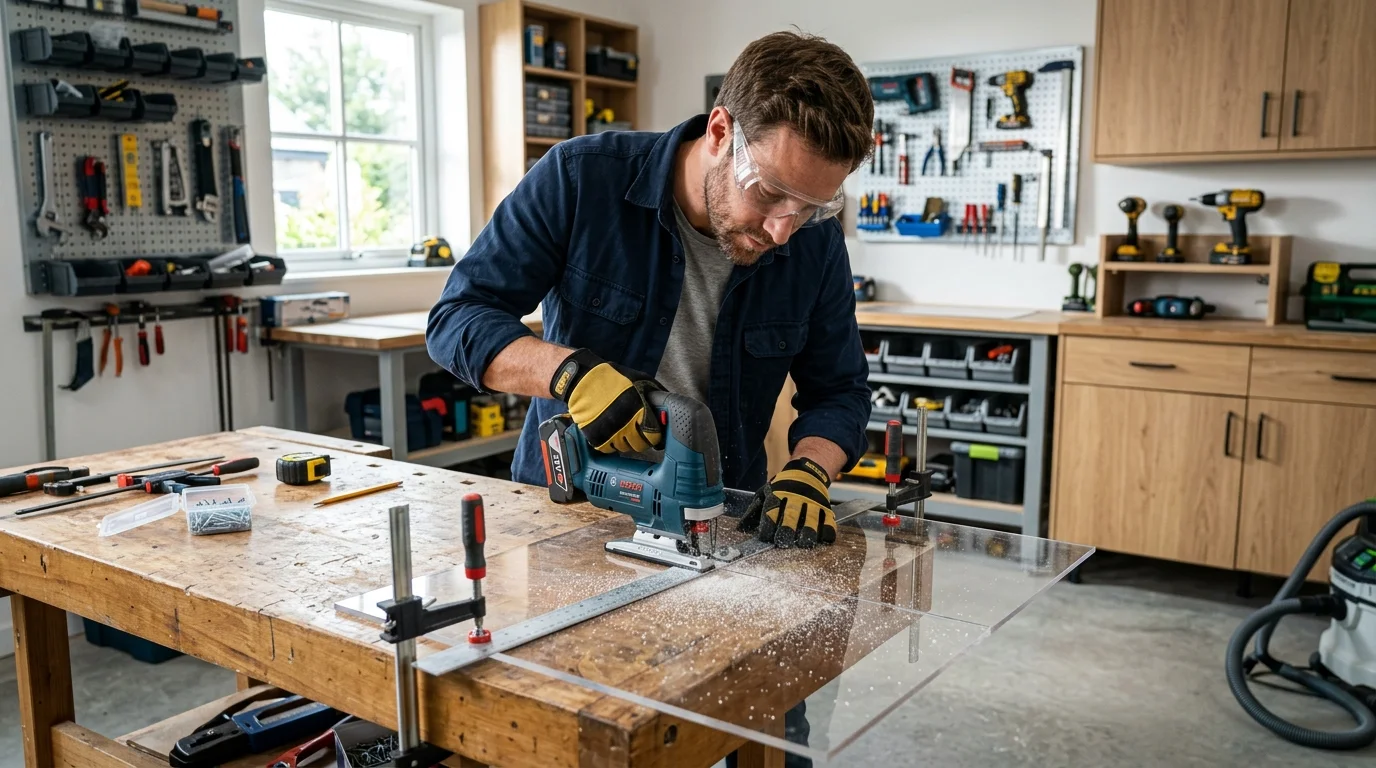
How to Cut Perspex With a Jigsaw
A jigsaw is one of the most versatile tools for cutting acrylic sheets because it handles both straight lines and curved shapes.
Choose the Correct Blade
Use a fine-tooth blade designed for acrylic or metal cutting. A blade with smaller teeth produces cleaner edges.
Clamp the Acrylic Properly
Secure the sheet firmly to reduce vibration during cutting.
Cut Slowly
Slow cutting speeds help prevent melting and reduce stress fractures. Let the blade move naturally without forcing it through the material.
Prevent Chipping
To reduce chipping:
- Keep the protective film attached
- Use masking tape along the cut line
- Support the sheet fully underneath
Many DIY users searching for how to cut perspex with a jigsaw make the mistake of cutting too quickly. Slow and controlled movements always produce better results.
How to Cut Thick Perspex With a Circular Saw or Table Saw
Thick acrylic sheets require stronger cutting tools for clean and accurate results.
Circular Saw vs Table Saw
A circular saw works well for portable cutting jobs, while a table saw offers maximum precision for long, straight cuts.
Use the Right Blade Speed
High speeds create friction and overheating of the acrylic. A moderate feed rate helps maintain a smooth edge finish.
Reduce Heat Buildup
You can reduce acrylic heat buildup by:
- Cutting slowly
- Pausing between cuts
- Using sharp blades
- Avoiding excessive pressure
Support the Entire Sheet
Large sheets should always be supported fully to prevent vibration and uneven cutting. This method is ideal for cutting thick acrylic sheets used in furniture, panels, and workshop projects.
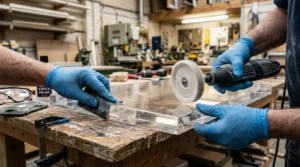
How to Cut Curves and Shapes in Perspex
Straight cuts are relatively simple, but curved cuts require more control and patience.
Using a Jigsaw for Curves
A jigsaw with a narrow, fine-tooth blade is excellent for cutting curves and custom shapes.
Router Cutting for Smooth Edges
A router creates highly accurate edges and is often used in professional acrylic fabrication.
CNC and Laser Cutting
CNC acrylic cutting and laser cutting acrylic are the best options for highly detailed shapes and intricate designs. These methods are commonly used in commercial workshops.
Tips for Better Shape Cutting
- Cut slowly around curves
- Avoid tight turns too quickly
- Keep the acrylic sheet stable
- Use sharp blades only
How to Prevent Perspex From Cracking or Melting
One of the biggest frustrations when cutting acrylic is cracking or melted edges.
Here are the best ways to avoid these problems.
Keep the Protective Film Attached
The film protects the acrylic surface and reduces scratches during cutting.
Use the Correct Blade
Fine tooth blades reduce vibration and improve edge quality.
Avoid Excessive Pressure
Too much pressure creates stress fractures and uneven cuts.
Clamp the Sheet Properly
Proper clamping prevents movement and vibration.
Cut at a Moderate Speed
Fast cutting generates friction and heat. Slow, controlled cutting produces cleaner results.
These techniques are essential for anyone learning how to cut perspex without cracking.
Common Mistakes Beginners Make When Cutting Perspex
Many DIY problems happen because of simple mistakes.
Using the Wrong Blade
Wood-cutting blades are often too aggressive for acrylic sheet cutting.
Cutting Too Fast
Fast cutting speeds increase heat and damage the acrylic finish.
Poor Sheet Support
Unsupported sheets flex during cutting and create cracks.
Ignoring Edge Finishing
Rough edges reduce the professional appearance of the final project.
Removing Protective Film Too Early
This increases scratches and surface damage.
Avoiding these common errors makes a huge difference in cut quality.
How to Smooth, Sand, and Polish Perspex Edges
Clean edge finishing gives acrylic projects a professional appearance.
Sanding Acrylic Edges
Start with medium-grit sandpaper and gradually move to finer grits for a smooth finish.
Hand Sanding vs Power Sanding
Hand sanding gives more control, while power sanding speeds up the process for larger projects.
Flame Polishing
Flame polishing uses controlled heat to create crystal clear edges. This technique requires care because too much heat can damage the acrylic.
Buffing for Extra Shine
Buffing compounds help create a polished glass-like finish.
Proper acrylic edge finishing improves both appearance and durability.
Advanced Tips for Professional Looking Results
Professional acrylic machining techniques can dramatically improve your results.
Use Sharp Blades Only
Dull blades create rough edges and extra heat.
Control Feed Rate
A steady feed rate reduces vibration and stress.
Reduce Blade Vibration
Stable support and proper clamping improve cutting precision.
Keep the Workspace Cool
High temperatures increase the risk of acrylic melting.
These professional techniques are commonly used in plastic fabrication workshops.
DIY Projects You Can Make With Cut Perspex
Once you understand how to cut acrylic cleanly, you can create many practical DIY projects.
Popular ideas include:
- Shelves
- Display cases
- Furniture protectors
- Greenhouse panels
- Wall art
- Desk covers
- Splashbacks
- Protective screens
Perspex is extremely versatile and works well for both decorative and functional projects.
FAQs
Can you cut Perspex with a knife?
Yes, thin sheets can be cut using an acrylic scoring knife and the score and snap method.
What is the best tool for cutting Perspex?
The best tool depends on the thickness. Thin sheets work well with scoring tools, while thick sheets require a jigsaw, circular saw, or table saw.
Why does acrylic melt while cutting?
Acrylic melts because of excessive heat caused by fast cutting speeds, dull blades, or too much friction.
What blade cuts acrylic best?
A fine-tooth carbide-tipped blade designed for acrylic or metal cutting usually provides the cleanest results.
Can you cut Perspex without power tools?
Yes, thin acrylic sheets can be cut manually using scoring tools and straight edge guides.
Final Thoughts
Learning how to cut perspex properly takes patience, the right tools, and careful technique. Whether you are using a scoring knife for thin sheets or a circular saw for thicker panels, the key is controlling heat, reducing vibration, and cutting slowly.
By choosing the correct acrylic cutting method, using fine tooth blades, and finishing the edges properly, you can achieve smooth, professional results at home. With practice, cutting acrylic sheets becomes much easier and opens the door to countless DIY and home improvement projects.


Leave a Reply